Roast Beef with a Vegetable Melody:
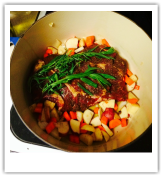
Hello, and happy Sunday, friends; how has your weekend been? It’s glorious here in Vermont, so I’ve been enjoying hikes through Hubbard Park, and having my windows open; it’s the little things in life. ;)
This recipe was inspired by a meat purchasing change, as my boyfriend and I have been trying to buy more local/organic produce and groceries. Therefore, I really wanted to showcase the cut of beef, instead of using the more traditional crockpot method. Additionally, this recipe could be prepared the night before, and baked after work for an easy weeknight meal. Thanks again for cooking with me, and have a great rest of your day!
Roast Beef with a Vegetable Melody:
Roasted Vegetables:
Roast Beef:
Seasoning Mixture:
Directions:
Preheat your oven to 350 degrees, and choose your cooking vessel; I would use the dutch oven, and a lined sheet tray, or glass casserole dish. Next, in a large bowl, combine the roasted vegetable ingredients, and season to taste; I would recommend one teaspoon salt, and a half teaspoon pepper. Set aside.
Next, mix together the seasoning mixture, and set aside; grease the dutch oven with either cooking spray, or a light drizzle of olive oil. Afterwards, unwrap the roast beef, and coat evenly with the seasoning mix; set the roast in the center of the dutch oven, and wash your hands. Then liberal salt the roast - using coarsely grated sea salt - and top with tarragon stems; lightly drizzle olive oil on top, in order to prevent the herbs from burning. Finally, arrange a portion of the vegetables around the roast; it should be surrounded, but not crowded. Place the remaining ingredients in your separate cooking vessel.
The roast should bake COVERED for one hour, or until the roast reaches 125 degrees, for medium rare. The vegetable should bake an hour in the casserole dish - covered in tin foil - or forty-five minutes on a lined sheet tray; the potatoes and carrots should be soft to the touch, before removing from the oven. After the roast is done, discard the tarragon stems, and allow to rest for ten minutes before slicing. Enjoy!
This recipe was inspired by a meat purchasing change, as my boyfriend and I have been trying to buy more local/organic produce and groceries. Therefore, I really wanted to showcase the cut of beef, instead of using the more traditional crockpot method. Additionally, this recipe could be prepared the night before, and baked after work for an easy weeknight meal. Thanks again for cooking with me, and have a great rest of your day!
Roast Beef with a Vegetable Melody:
Roasted Vegetables:
- 4-5 potatoes, I would use either red or Yukon gold, cut into large dice
- 6-8 carrots, depending upon size, cut into large dice
- 1-2 sweet onions, cut into large dice
- 2-3 tablespoons olive oil
- 1 tablespoon chopped parsley, either dry or fresh
- Salt and pepper
Roast Beef:
- ~ 3 lb. beef roast
- Olive Oil
- Liberal Salt and below seasoning mixture
- Tarragon
Seasoning Mixture:
- 1/2 teaspoon dry mustard
- 1/2 teaspoon garlic powder
- 1/4 teaspoon paprika
- 1 teaspoon pepper
- Liberal pinch of cayenne pepper
Directions:
Preheat your oven to 350 degrees, and choose your cooking vessel; I would use the dutch oven, and a lined sheet tray, or glass casserole dish. Next, in a large bowl, combine the roasted vegetable ingredients, and season to taste; I would recommend one teaspoon salt, and a half teaspoon pepper. Set aside.
Next, mix together the seasoning mixture, and set aside; grease the dutch oven with either cooking spray, or a light drizzle of olive oil. Afterwards, unwrap the roast beef, and coat evenly with the seasoning mix; set the roast in the center of the dutch oven, and wash your hands. Then liberal salt the roast - using coarsely grated sea salt - and top with tarragon stems; lightly drizzle olive oil on top, in order to prevent the herbs from burning. Finally, arrange a portion of the vegetables around the roast; it should be surrounded, but not crowded. Place the remaining ingredients in your separate cooking vessel.
The roast should bake COVERED for one hour, or until the roast reaches 125 degrees, for medium rare. The vegetable should bake an hour in the casserole dish - covered in tin foil - or forty-five minutes on a lined sheet tray; the potatoes and carrots should be soft to the touch, before removing from the oven. After the roast is done, discard the tarragon stems, and allow to rest for ten minutes before slicing. Enjoy!
Wild Rice Casserole:
Hello! How is your week going? It is finally beginning to feel like spring in Montpelier, and I’m looking forward to some nice, long walks this weekend. While this recipe has taken a few attempts, it has quickly become a staple in our kitchen, due to its versatility. Personally, I like its volume, because the leftovers are excellent on top of Portobello mushroom caps; it’s a great weeknight meal option, or a freezer meal to reheat later in the month. I hope that you enjoy it as well, and thanks for cooking with me! :)
Wild Rice Casserole:
Topping:
Preheat the oven to 375 degrees, and choose your cooking vessel; I used a dutch oven, which is probably the best option for this recipe. Over medium heat, add your chosen fat, chopped onions, and mushrooms. Once the onions are translucent, add the carrots, celery, cranberries, and wild rice mix; cook for an additional four to five minutes, while stirring every one to two minutes. Next, add your chicken stock, and bring to a boil; once boiling, reduce to low, and cover. Continue to cook for thirty-five to forty minutes, depending upon your wild rice blend, and stir intermediately. Once complete, remove from heat, and add remaining ingredients; season to taste.
Cover, and bake for an additional twenty minutes. While the casserole is baking, assemble it's topping, by mixing together the four ingredients. Once twenty minutes has past, remove the casserole from the oven, and set your oven to the broil setting. Next, top the casserole with the bread crumbs, a drizzle of honey and balsamic vinegar, and salt and pepper to taste.
Finally, return the casserole to the oven for another four to seven minutes, or until the golden brown. Allow to cool for a few minutes before serving, and enjoy!
Wild Rice Casserole:
- 2 cups mushrooms, small dice
- 1 cup onion, I used Vidalia, small dice
- 1 cup carrots, small dice
- 1 cup celery, small dice
- 1 cup cranberries
- 2 1/2 cups wild rice mix
- 2-3 tablespoons choice of fat, I used half butter, and half olive oil
- 4 3/4 cups chicken stock
- 3-4 tablespoons chopped cilantro
- 1/4-1/3 cup grated parmesan cheese
- 1 liberal pinch cayenne pepper
- 1 1/2 teaspoons onion powder
- 1 1/2 teaspoons garlic powder
- 2 tablespoons lemon juice
- Salt and pepper
Topping:
- 1/2-3/4 cup bread crumbs, I used leftover cornbread, but regular bread will suffice
- 2-3 tablespoons choice of fat, I used brown butter
- 1-2 tablespoons chopped cilantro
- 2-3 tablespoons grated parmesan cheese
- Salt and pepper
- Honey
- Reduced balsamic vinegar
Preheat the oven to 375 degrees, and choose your cooking vessel; I used a dutch oven, which is probably the best option for this recipe. Over medium heat, add your chosen fat, chopped onions, and mushrooms. Once the onions are translucent, add the carrots, celery, cranberries, and wild rice mix; cook for an additional four to five minutes, while stirring every one to two minutes. Next, add your chicken stock, and bring to a boil; once boiling, reduce to low, and cover. Continue to cook for thirty-five to forty minutes, depending upon your wild rice blend, and stir intermediately. Once complete, remove from heat, and add remaining ingredients; season to taste.
Cover, and bake for an additional twenty minutes. While the casserole is baking, assemble it's topping, by mixing together the four ingredients. Once twenty minutes has past, remove the casserole from the oven, and set your oven to the broil setting. Next, top the casserole with the bread crumbs, a drizzle of honey and balsamic vinegar, and salt and pepper to taste.
Finally, return the casserole to the oven for another four to seven minutes, or until the golden brown. Allow to cool for a few minutes before serving, and enjoy!
Rhubarb Chia Seed Pie:
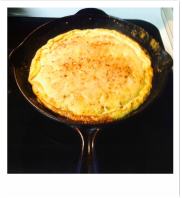
Hello all! I hope that you are having a wonderful Saturday; it’s a little chilly here, but I’ve had a productive morning, so I’m feeling accomplished. ;) I made this pie before returning to Vermont, and it was a hit; the consistency is similar to a fig newton, except slightly thinner. Overall, I foresee this recipe being used throughout the summer, and with a variety of fruits. I hope that you enjoy it as well, and have a great rest of your weekend!
Rhubarb Chia Seed Pie:
Rhubarb Pie Filling:
Preheat the oven to 350 degrees, and choose your baking vessel; I used a cast iron skillet – as I do not own a pie dish – but that would be preferred. Grease the dish with softened butter, and dust with flour, before shaking off any excess. Set aside, and begin the rhubarb pie filling.
In a medium saucepan, whisk together the corn starch and water, before adding the remaining ingredients; I would recommend starting with 1 ½ cups of sugar, and adding more as desired. Cook the mixture over medium heat for twenty to thirty minutes, depending upon your desired consistency and overall knife cuts (i.e. small dice efficiency). Allow to slightly cool, before continuing; i.e. five to ten minutes.
Unfold the first pie crust into your baking dish, making sure to cover the sides; I had to roll my pie crusts slightly larger, given the size of the cast iron. Next, pour the filling evenly over the surface, before attaching your second pie crust; gently fold the sides over, so that the top and bottom crusts are enclosed. Finally, pat the crust’s surface with softened butter, and sprinkle with cinnamon and sugar; cut small vents into its surface, creating a pattern of your choosing.
Bake the pie for twenty-five to forty minutes, depending upon the size of your baking dish; my pie took twenty-five minutes to bake. Allow the pie to cool before serving, as the filling needs to set; enjoy with vanilla ice cream, or on its own!
Rhubarb Chia Seed Pie:
- Rhubarb Pie Filling
- Pie crust, either purchased or prepared
- 2-3 tablespoons butter, softened
- Flour
- Cinnamon and Sugar
Rhubarb Pie Filling:
- 2 cups rhubarb, small dice
- 1 ½-2 cups sugar, depending upon desired sweetness
- 1 cup water
- 3-4 tablespoons chia seeds, depending upon desired consistency
- Lemon juice, optional
Preheat the oven to 350 degrees, and choose your baking vessel; I used a cast iron skillet – as I do not own a pie dish – but that would be preferred. Grease the dish with softened butter, and dust with flour, before shaking off any excess. Set aside, and begin the rhubarb pie filling.
In a medium saucepan, whisk together the corn starch and water, before adding the remaining ingredients; I would recommend starting with 1 ½ cups of sugar, and adding more as desired. Cook the mixture over medium heat for twenty to thirty minutes, depending upon your desired consistency and overall knife cuts (i.e. small dice efficiency). Allow to slightly cool, before continuing; i.e. five to ten minutes.
Unfold the first pie crust into your baking dish, making sure to cover the sides; I had to roll my pie crusts slightly larger, given the size of the cast iron. Next, pour the filling evenly over the surface, before attaching your second pie crust; gently fold the sides over, so that the top and bottom crusts are enclosed. Finally, pat the crust’s surface with softened butter, and sprinkle with cinnamon and sugar; cut small vents into its surface, creating a pattern of your choosing.
Bake the pie for twenty-five to forty minutes, depending upon the size of your baking dish; my pie took twenty-five minutes to bake. Allow the pie to cool before serving, as the filling needs to set; enjoy with vanilla ice cream, or on its own!
Salmon en Papillote, Curried-Spiced Sweet Potatoes, and Moroccan Couscous:
Hello all! Happy spring and longer days to each one of you; how have you been? While my midterm leave was longer than anticipated, I have some delicious new recipes to share, so I hope that you are hungry. Below is a menu that I developed for one of my friends, who just had a baby this past week! She and her husband created a meal registry on MealBaby.com, and I was fortunate enough to participate, via a Minnesotan-based saint. Overall, I love the website’s concept, and hope to see it used more in the future.
When planning this menu, I had considered the following components: 1) nutrition, 2) likeability, and 3) dietary restrictions. Therefore, the recipes include healthy fats, minimal spice (heat), are dairy-free, and should (hopefully?) be kid-friendly. Additionally, I wanted the menu to be easily transportable, and carefree. Therefore, the salmon can be prepared the night before, and reheated on site; while the sweet potatoes and couscous can be prepared in less than hour, and served at room temperature.
Finally, I’ve included some additional literature on maternal diets, and the development of taste; it is truly food for thought:
Mennella, J. A., Jagnow, C. P., & Beauchamp, G. K. (2001). Prenatal and Postnatal Flavor Learning by Human Infants. Pediatrics , 107 (6).
Salmon En Papillote:
Mustard Aioli: Optional
Preheat your oven to 350 degrees, and choose your cooking vessel; I usually use a cookie sheet, but a casserole dish or cake pan would also suffice. Next, depending upon the number of salmon portions you are preparing, cut your parchment sheet pieces; they should be 12 x 18 inches. Then, spray the bottom of each piece with cooking spray, and top with ¼-⅓ cup of spinach. Next, place the salmon on top of the bed of spinach, followed by a drizzle of olive oil; season to taste with salt and pepper. Finally, top the salmon fillets with sliced lemon and herbs, if desired.
To assemble the packets, fold the edges of the paper over several times, in order to seal the salmon into a parchment paper envelope. Place the sealed envelopes onto a baking sheet, and brush the tops of each packet with about 1 teaspoon of olive oil; this step is optional, but will prevent the tops of the parchment from burning.
Bake the salmon for twenty to twenty-five minutes, or until the salmon has an internal temperature of one hundred and forty-five degrees. While the salmon if baking, prepare the mustard aioli, if desired. Simply mix all the ingredients together, and place in a ramekin until the salmon is ready to enjoy!
Minnesota-Sweet Indian Spiced Sweet Potatoes:
Minnesota-Sweet Indian Spice Mix:
Preheat your oven to 425 degrees, and choose your cooking vessel; I usually use a lined cookie sheet, but a greased cake pan or casserole dish will suffice. In a large bowl, combine the first three ingredients, and toss until the spice mix is evenly distributed. Then, place the potatoes on your baking sheet, and bake for twenty-thirty minutes; they should be baked potato consistency upon removal. Once slightly cooled, top with fresh cilantro, if desired.
Moroccan Couscous:
In a medium saucepan, bring your liquid to a boil; add the olive oil, raisins, and spices to liquid in the interim. Once boiling, add your couscous, and stir; bring back to a boil, cover, and remove from heat. Allow the couscous to set – COVERED – for five to seven minutes, before fluffing with a fork. Season to taste, and add chopped cilantro and/or lemon juice, if desired.
When planning this menu, I had considered the following components: 1) nutrition, 2) likeability, and 3) dietary restrictions. Therefore, the recipes include healthy fats, minimal spice (heat), are dairy-free, and should (hopefully?) be kid-friendly. Additionally, I wanted the menu to be easily transportable, and carefree. Therefore, the salmon can be prepared the night before, and reheated on site; while the sweet potatoes and couscous can be prepared in less than hour, and served at room temperature.
Finally, I’ve included some additional literature on maternal diets, and the development of taste; it is truly food for thought:
Mennella, J. A., Jagnow, C. P., & Beauchamp, G. K. (2001). Prenatal and Postnatal Flavor Learning by Human Infants. Pediatrics , 107 (6).
Salmon En Papillote:
- Salmon portions, dependent upon number of servings desired
- Spinach, most likely 1-2 cups
- 1 lemon, thinly sliced
- Fresh dill, cilantro, or thyme
- Olive oil
- Salt and pepper
Mustard Aioli: Optional
- ¼ cup mayonnaise
- ¼ cup Dijon mustard
- 1 liberal pinch of cayenne pepper
- 1 tablespoon finely chopped dill, optional
- Salt and pepper to taste
Preheat your oven to 350 degrees, and choose your cooking vessel; I usually use a cookie sheet, but a casserole dish or cake pan would also suffice. Next, depending upon the number of salmon portions you are preparing, cut your parchment sheet pieces; they should be 12 x 18 inches. Then, spray the bottom of each piece with cooking spray, and top with ¼-⅓ cup of spinach. Next, place the salmon on top of the bed of spinach, followed by a drizzle of olive oil; season to taste with salt and pepper. Finally, top the salmon fillets with sliced lemon and herbs, if desired.
To assemble the packets, fold the edges of the paper over several times, in order to seal the salmon into a parchment paper envelope. Place the sealed envelopes onto a baking sheet, and brush the tops of each packet with about 1 teaspoon of olive oil; this step is optional, but will prevent the tops of the parchment from burning.
Bake the salmon for twenty to twenty-five minutes, or until the salmon has an internal temperature of one hundred and forty-five degrees. While the salmon if baking, prepare the mustard aioli, if desired. Simply mix all the ingredients together, and place in a ramekin until the salmon is ready to enjoy!
Minnesota-Sweet Indian Spiced Sweet Potatoes:
- 3-4 large sweet potatoes, peeled and cut into large dice
- 3 tablespoons coconut oil, melted
- Minnesota-Sweet Indian Spice Mix, see below
- 2 tablespoons chopped cilantro, optional
Minnesota-Sweet Indian Spice Mix:
- ½ teaspoon curry powder
- ½ teaspoon ground cumin
- ¼ teaspoon cinnamon
- 1 tablespoon brown sugar
- 1 pinch of cayenne pepper
- Salt and pepper to taste
Preheat your oven to 425 degrees, and choose your cooking vessel; I usually use a lined cookie sheet, but a greased cake pan or casserole dish will suffice. In a large bowl, combine the first three ingredients, and toss until the spice mix is evenly distributed. Then, place the potatoes on your baking sheet, and bake for twenty-thirty minutes; they should be baked potato consistency upon removal. Once slightly cooled, top with fresh cilantro, if desired.
Moroccan Couscous:
- ⅓ cup raisins or dates, roughly chopped
- 1 ½ teaspoons cumin
- 1 ½ teaspoons coriander
- ¼ teaspoon nutmeg
- 1 tablespoon olive oil
- 1 ⅓ cup vegetable stock OR water
- 1 cup dry couscous
- Salt and pepper
- 3 tablespoons chopped cilantro, optional
- Lemon juice, optional
In a medium saucepan, bring your liquid to a boil; add the olive oil, raisins, and spices to liquid in the interim. Once boiling, add your couscous, and stir; bring back to a boil, cover, and remove from heat. Allow the couscous to set – COVERED – for five to seven minutes, before fluffing with a fork. Season to taste, and add chopped cilantro and/or lemon juice, if desired.
Brussel Sprout, Butternut Squash, and Grape Salad with Kale and a Red Wine Vinaigrette:
Hello again! This is my last and final recipe for the week, so I hope that it finds you well. Next week, I have midterms, so I won’t be posting a weekly menu or recipes. However, I hope that you have an enjoyable week, and I look forward to seeing you again soon!
Meal Three: Brussel Sprout, Butternut Squash, and Grape Salad with Kale and a Red Wine Vinaigrette
Brussel Sprout, Butternut Squash, and Grape Salad with Kale:
Preheat the oven to 425 degrees, and choose your baking instrument; I usually use a sheet tray, but a cast iron or cake pan will also suffice. Next, whisk together the red wine vinegar, mustard, and olive oil; once incorporated, toss with the brussel sprouts and squash, and mix until all pieces are evenly covered. Place the dressed vegetables in your chosen dish, and bake for 20-30 minutes, or until they are fully cooked.
While the vegetables are baking, lightly dress the kale, so that its fibers can start breaking down. Next, over medium-low heat, lightly toast the pine nuts for 2-3 minutes. Finally, reheat the cooked bacon, so that it is ready to use.
Once the vegetables are done, toss all ingredients together, and season to taste. This salad is excellent alone, or served along side a portion of chicken or salmon.
Red Wine Vinaigrette:
For this recipe, I used an emulsion blender, but a regular blender or food processor will also suffice. First, puree the olives, cranberries, shallot, garlic, mustard, cilantro, vinegar, lemon juice, and cayenne pepper. Once smooth and evenly incorporated, slowly stream in the olive oil, and season to taste. Please note, any additional vinaigrette
Meal Three: Brussel Sprout, Butternut Squash, and Grape Salad with Kale and a Red Wine Vinaigrette
Brussel Sprout, Butternut Squash, and Grape Salad with Kale:
- 1 cup brussel sprouts, halved
- 1 cup butternut squash, medium dice
- 2 tablespoons olive oil
- 1 tablespoon red wine vinegar
- 1 tablespoon mustard
- 1/4 cup bacon, thinly sliced, cooked
- 2-3 tablespoons pine nuts, lightly toasted
- 1/2 cup red grapes, halved
- 2 cups kale, prepared for use
- Red Wine Vinaigrette
- Goat cheese crumbles
- Salt and pepper
Preheat the oven to 425 degrees, and choose your baking instrument; I usually use a sheet tray, but a cast iron or cake pan will also suffice. Next, whisk together the red wine vinegar, mustard, and olive oil; once incorporated, toss with the brussel sprouts and squash, and mix until all pieces are evenly covered. Place the dressed vegetables in your chosen dish, and bake for 20-30 minutes, or until they are fully cooked.
While the vegetables are baking, lightly dress the kale, so that its fibers can start breaking down. Next, over medium-low heat, lightly toast the pine nuts for 2-3 minutes. Finally, reheat the cooked bacon, so that it is ready to use.
Once the vegetables are done, toss all ingredients together, and season to taste. This salad is excellent alone, or served along side a portion of chicken or salmon.
Red Wine Vinaigrette:
- 1/4 cup red wine vinegar
- 2 tablespoons lemon juice
- 2 olives, pitted
- 3 dried cranberries
- 1 tablespoon minced shallot
- 1 tablespoon mustard
- 1/2 teaspoon honey
- 1 tablespoon minced garlic
- 3 tablespoons finely chopped cilantro
- 2/3 cup olive oil
- 1 pinch of cayenne pepper
- Salt and pepper
For this recipe, I used an emulsion blender, but a regular blender or food processor will also suffice. First, puree the olives, cranberries, shallot, garlic, mustard, cilantro, vinegar, lemon juice, and cayenne pepper. Once smooth and evenly incorporated, slowly stream in the olive oil, and season to taste. Please note, any additional vinaigrette
Brussel Sprout Pizza:
Hello all! I apologize for this recipe’s tardiness; I’ve been busy getting resettled in Beckley, and finishing my school assignments. Nevertheless, I hope that I haven’t interrupted your week’s menu. :/
Personally, this is one of my go-to meals, when I need to have dinner ready quick. I usually pair it with a lemon and parsley kale salad, as its acidity is extremely complimentary. Thanks again for cooking with me, and enjoy your day! :)
Meal Two: Brussel Sprout Pizza
Brussel Sprout Pizza:
Preheat the oven to 425 degrees, and choose your baking instrument; personally, I usually use a sheet tray, but a pizza pan will also suffice. Next, place your pizza crust(s) on your selection, so that it's waiting for you.
Over medium to medium-high heat, sauté the brussel sprouts and olive oil for 3-5 minutes, or until slightly softened. Next, add the vinegars, and cook for an additional 3-4 minutes; please note, the vinegar should be fully reduced before finishing this step. Add the garlic, and evenly disperse the cooked sprouts over the crust(s), while leaving the outer edge clear.
Next, in a small bowl mix together the two cheeses and herbs, until evenly incorporated. Then, sprinkle the mixture over the sprouts, and top with a drizzle of honey and balsamic reduction. Finally, season to taste, and bake for 15-20 minutes. For best results, allow the pizza to cool for 2-3 minutes, before slicing. Enjoy!
Personally, this is one of my go-to meals, when I need to have dinner ready quick. I usually pair it with a lemon and parsley kale salad, as its acidity is extremely complimentary. Thanks again for cooking with me, and enjoy your day! :)
Meal Two: Brussel Sprout Pizza
Brussel Sprout Pizza:
- Pre made Pizza crust of your choice
- 1-1 1/2 cups of thinly shaved brussel sprouts
- 2-3 tablespoons of olive oil
- 1 1/2 tablespoons minced garlic
- 1 tablespoon champagne vinegar
- 2-3 tablespoons balsamic vinegar
- 2/3 cup shredded sharp white cheddar cheese
- 3 tablespoons grated parmesan
- 1-1 1/2 tablespoons finely chopped herbs
- Salt and pepper
- Honey
- Balsamic reduction
Preheat the oven to 425 degrees, and choose your baking instrument; personally, I usually use a sheet tray, but a pizza pan will also suffice. Next, place your pizza crust(s) on your selection, so that it's waiting for you.
Over medium to medium-high heat, sauté the brussel sprouts and olive oil for 3-5 minutes, or until slightly softened. Next, add the vinegars, and cook for an additional 3-4 minutes; please note, the vinegar should be fully reduced before finishing this step. Add the garlic, and evenly disperse the cooked sprouts over the crust(s), while leaving the outer edge clear.
Next, in a small bowl mix together the two cheeses and herbs, until evenly incorporated. Then, sprinkle the mixture over the sprouts, and top with a drizzle of honey and balsamic reduction. Finally, season to taste, and bake for 15-20 minutes. For best results, allow the pizza to cool for 2-3 minutes, before slicing. Enjoy!
Meatloaf, with Mashed Red Potatoes, and Brussel Sprouts:
Hello! I hope that you are having an amazing Saturday. Growing up, my mom would usually make meatloaf on Valentine’s Day because: a) it was one of my favorite meals, and b) we had a heart-shaped cake pan that she could bake it. #cuteness
I hope that you enjoy one of my favorite meals as well, and spend tomorrow showing yourself and others a little extra love. Thanks so much for cooking with me, and I hope to see you back here on Monday for recipe number two for the week. xx
Meal One: Meatloaf with Mashed Red Potatoes and Brussel Sprouts
BBQ Sauce: Sweet Minnesota Heat
Upon measuring all of the ingredients, thoroughly combine, and store in a glass jar or Tupperware container. This BBQ sauce is excellent on chicken, pork, or salmon.
Meatloaf:
Before beginning, unwrap the raw meat, and place in a large bowl. After washing your hands, preheat the oven to 350 degrees, and choose your baking dish; I usually use a casserole dish, but a cake pan will also suffice. Next, grease the baking dish with either cooking spray or coconut oil, and gather the remaining ingredients. In a medium bowl, whisk together the eggs, milk, ketchup, BBQ sauce, mustard, garlic, parsley, and salt and pepper. After those ingredients are evenly incorporated, fold in the rice and oats. Next, pour the mixture over the ground meat, and mix until evenly incorporated; I usually do this step by hand, as you don’t want to over mix the meat, as it will toughen. Finally, place the meatloaf mixture in your baking dish, and wash your hands. I usually top the mixture with half of the sauce now, before covering and baking for forty minutes. Then I remove the cover, put the rest of the sauce on, and bake for another twenty minutes; however, it’s important to remember that your baking time may vary, depending upon the size of your baking dish. The meatloaf needs to reach 165 degrees, before it can be safely consumed.
Sauce for the Meatloaf:
After measuring all the ingredients, combine thoroughly, and use according to the meatloaf’s directions.
Mashed Red Potatoes:
Before beginning, choose your baking dish, and grease with either cooking spray or coconut oil; I usually use an 8x8 cake pan, but a casserole dish will also suffice. Please place the quartered potatoes in your baking dish. Next, in a large glass measuring cup, measure out the milk and butter; heat these ingredients in the microwave for thirty seconds, or until the butter is melted. Then pour half of the mixture over the potatoes, and cover with aluminum foil. Bake at 350 degrees for twenty minutes, before adding the remaining ingredients**, and baking (again covered) for another twenty to twenty-five minutes, depending upon the size of your potatoes.
**You can coordinate this step with the meatloaf, so that you are only opening the oven once. :)
Roasted Brussel Sprouts:
In a medium bowl, whisk together the olive oil, balsamic vinegar, mustard, garlic, parsley, and pepper. Next, add in the brussel sprouts, and mix until evenly incorporated. Place the sprouts on a lined sheet tray, and bake for twenty minutes, before adding the cooked bacon. Bake for an additional five minutes – or until the bacon is heated – and season to taste.
I hope that you enjoy one of my favorite meals as well, and spend tomorrow showing yourself and others a little extra love. Thanks so much for cooking with me, and I hope to see you back here on Monday for recipe number two for the week. xx
Meal One: Meatloaf with Mashed Red Potatoes and Brussel Sprouts
BBQ Sauce: Sweet Minnesota Heat
- 1/2 tablespoon liquid smoke
- 1 teaspoon garlic salt
- 1 1/2 teaspoons crushed red pepper flakes
- 1 liberal pinch of cayenne pepper
- ½ teaspoon chili powder
- 1 teaspoon mustard powder
- 1/4 teaspoon curry powder
- 1 teaspoon pepper
- 1 tablespoon A-1
- 1/4 teaspoon soy sauce
- 3/4 cup brown sugar
- 1 3/4 cup ketchup
Upon measuring all of the ingredients, thoroughly combine, and store in a glass jar or Tupperware container. This BBQ sauce is excellent on chicken, pork, or salmon.
Meatloaf:
- 2 pounds ground beef or turkey
- 1/3 cup prepared wild rice blend
- 1/3 cup quick cook oatmeal (dry)
- 1/4 cup Sweet Minnesota Heat BBQ sauce
- 1/4 cup ketchup
- 2 tablespoons mustard
- 2 tablespoon minced garlic
- 2 eggs
- 1/3-1/2 cup milk
- 3 tablespoons finely chopped parsley
- Salt and pepper
Before beginning, unwrap the raw meat, and place in a large bowl. After washing your hands, preheat the oven to 350 degrees, and choose your baking dish; I usually use a casserole dish, but a cake pan will also suffice. Next, grease the baking dish with either cooking spray or coconut oil, and gather the remaining ingredients. In a medium bowl, whisk together the eggs, milk, ketchup, BBQ sauce, mustard, garlic, parsley, and salt and pepper. After those ingredients are evenly incorporated, fold in the rice and oats. Next, pour the mixture over the ground meat, and mix until evenly incorporated; I usually do this step by hand, as you don’t want to over mix the meat, as it will toughen. Finally, place the meatloaf mixture in your baking dish, and wash your hands. I usually top the mixture with half of the sauce now, before covering and baking for forty minutes. Then I remove the cover, put the rest of the sauce on, and bake for another twenty minutes; however, it’s important to remember that your baking time may vary, depending upon the size of your baking dish. The meatloaf needs to reach 165 degrees, before it can be safely consumed.
Sauce for the Meatloaf:
- 1/4 cup ketchup
- 3 tablespoons Sweet Minnesota Heat BBQ sauce
- 1 tablespoon mustard
- 1 1/4 teaspoon minced garlic
- 2 tablespoons brown sugar
- Salt and pepper
After measuring all the ingredients, combine thoroughly, and use according to the meatloaf’s directions.
Mashed Red Potatoes:
- 4-6 red potatoes, washed and quartered
- 2-3 tablespoons butter
- 1/3-1/2 cup milk
- 3 tablespoons grated parmesan cheese
- 2 tablespoons finely chopped parsley
- 2 tablespoons finely chopped cilantro
- 2 tablespoons finely minced garlic
- 1 pinch of cayenne pepper
- Salt and pepper
Before beginning, choose your baking dish, and grease with either cooking spray or coconut oil; I usually use an 8x8 cake pan, but a casserole dish will also suffice. Please place the quartered potatoes in your baking dish. Next, in a large glass measuring cup, measure out the milk and butter; heat these ingredients in the microwave for thirty seconds, or until the butter is melted. Then pour half of the mixture over the potatoes, and cover with aluminum foil. Bake at 350 degrees for twenty minutes, before adding the remaining ingredients**, and baking (again covered) for another twenty to twenty-five minutes, depending upon the size of your potatoes.
**You can coordinate this step with the meatloaf, so that you are only opening the oven once. :)
Roasted Brussel Sprouts:
- 1 1/2-2 cups brussel sprouts, halved
- 1/3 cup bacon, cut into small slices
- 2-3 tablespoons balsamic vinegar
- 2-3 tablespoons olive oil
- 1 1/2 tablespoons mustard
- 1 tablespoon finely minced garlic
- 2 tablespoons finely chopped parsley
- Salt and pepper
In a medium bowl, whisk together the olive oil, balsamic vinegar, mustard, garlic, parsley, and pepper. Next, add in the brussel sprouts, and mix until evenly incorporated. Place the sprouts on a lined sheet tray, and bake for twenty minutes, before adding the cooked bacon. Bake for an additional five minutes – or until the bacon is heated – and season to taste.
Black Beans with Fried Eggs, Toast, and a Side Salad:
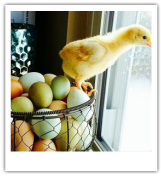
Hello! How are you today? Unfortunately, Montpelier has been having less than favorable photography weather, so all my food pictures are a little ... ugly. However, this baby chick is not, so thanks for filling in baby chick. ;)
Personally, I eat a lot of eggs, as they are an inexpensive source of protein. Additionally, this is a great ‘power boasting’ meal to eat, before going on a hike, long walk, etc. Thanks again for cooking with me, and I hope to see you here again soon! :)
Meal Three: Black Beans with Fried Eggs, Toast, and a Side Salad
Salad Dressing:
Before beginning, gather your ingredients, so that they are waiting for you. Next, whisk together the first four ingredients, until they are evenly incorporated. Then slowly drizzle in your vinegar, followed by the lemon juice; if done properly, the mixture shouldn’t want to separate. Next – while continuing to whisk – slowly add in the oil: a couple of drops, followed by a steady stream. This process is also known as ‘creating an emulsion’; you are so fancy. :)
Once the oil is fully incorporated, season to taste, and add in any additionally ingredients.
Salad:
Toss together your desired ingredients with the salad dressing, and set aside; it’s time to begin the next recipe. :)
Black Beans, Egg, and Toast:
To reheat the beans, either microwave for 1-2 minutes, or cook on the stovetop for 3-5 minutes; once done, cover, and set aside. Next, preheat your frying pan over medium heat, and add ½ tablespoon butter and the vegetable oil. Once the butter is melted, add your cracked eggs, and cook for 2-3 minutes, before flipping to the other side. After another 1-2 minutes, remove from the heat, and season to taste.
Before plating, begin toasting your bread, if desired. Next, place the heated black beans on your dinner plate, followed by the egg(s). Finally, butter the toast, and enjoy with your side salad! :)
Personally, I eat a lot of eggs, as they are an inexpensive source of protein. Additionally, this is a great ‘power boasting’ meal to eat, before going on a hike, long walk, etc. Thanks again for cooking with me, and I hope to see you here again soon! :)
Meal Three: Black Beans with Fried Eggs, Toast, and a Side Salad
Salad Dressing:
- 1 tablespoon of mustard
- 1 ½ teaspoons of garlic
- 1 ½ teaspoons of sugar
- 1 pinch of cayenne pepper
- 2-3 tablespoons of red wine or balsamic vinegar
- 1 tablespoon lemon juice, optional
- 3-5 tablespoons olive oil, dependent upon your preference
- 2-3 tablespoons chopped herbs, I typically use either cilantro, parsley, or basil; however, it is optional
- 1-2 tablespoons of finely grated red onion, optional
- Salt and pepper
Before beginning, gather your ingredients, so that they are waiting for you. Next, whisk together the first four ingredients, until they are evenly incorporated. Then slowly drizzle in your vinegar, followed by the lemon juice; if done properly, the mixture shouldn’t want to separate. Next – while continuing to whisk – slowly add in the oil: a couple of drops, followed by a steady stream. This process is also known as ‘creating an emulsion’; you are so fancy. :)
Once the oil is fully incorporated, season to taste, and add in any additionally ingredients.
Salad:
- Greens of choice, I typically either use spinach
- Grated carrots, optional
Toss together your desired ingredients with the salad dressing, and set aside; it’s time to begin the next recipe. :)
Black Beans, Egg, and Toast:
- ½ c. prepared black beans, either leftover or purchased
- 1 tablespoon of butter, divided
- 1 teaspoon of vegetable oil
- 1-2 eggs
- 1-2 pieces of bread, optional
- Salt and pepper
To reheat the beans, either microwave for 1-2 minutes, or cook on the stovetop for 3-5 minutes; once done, cover, and set aside. Next, preheat your frying pan over medium heat, and add ½ tablespoon butter and the vegetable oil. Once the butter is melted, add your cracked eggs, and cook for 2-3 minutes, before flipping to the other side. After another 1-2 minutes, remove from the heat, and season to taste.
Before plating, begin toasting your bread, if desired. Next, place the heated black beans on your dinner plate, followed by the egg(s). Finally, butter the toast, and enjoy with your side salad! :)
Homemade Black Bean, Rice, and Pork Enchiladas:
Hello all! I hope that you are enjoying your weekend, and perhaps the football game. While I will be working on homework, it looks like an exciting line-up, so place your bets accordingly – and by bets, I mean guesses, and not actual money. ;) I actually know very little about football – or most sports in general – so I’ll just share this recipe instead. It’s one of my favorites, so I hope that you like it as well, and have a fantastic rest of your day! :)
Meal Two: Enchiladas
Enchilada Sauce:
Please ready your ingredients before beginning, as the sauce progresses quickly, and will need your attention throughout. Additionally, this recipe requires a medium sized saucepot, and a rubber spatula that you don’t mind staining.
Over medium-high heat, add the first three ingredients to your saucepot, and continue to stir until slightly caramelized; this process is also known as pincer, and will add a lot of depth to your sauce. Additionally, it’s important to know that the mixture will contract in size, as the moisture evaporates; this is completely normal, so do not be alarmed. If you are adding beer to the sauce, please do so now, as it will decaramelize your saucepot; if not, that is okay, as the crushed tomatoes will do that as well. Next, add the crushed tomatoes and garlic, and turn the heat down to medium; continue to stir, as the tomatoes have a lot of sugar, and can burn easily. Finally, add the honey, your choice of acid, and season to taste; the honey and acid actually balance out the acidity of the tomatoes, so don’t be alarmed by their addition. Continue to cook for another 3-4 minutes, are until the sauce is slightly bubbling; turn off the heat, and begin preparing the enchiladas.
**You can also use pureed roasted peppers, or a combination of the two, depending upon your taste and their availability. Personally, I tend to use a combination, because of health issues (i.e. acid reflux). Additionally, it’s a great way to utilize ‘on their way out’ produce. :)
Enchiladas:
Now it’s time to assemble the enchiladas; I’ve created a slide show below, which has the step-by-step instruction. It’s important to remember to work backwards, as the enchiladas will flip directions once folded, and placed into the baking dish.
Meal Two: Enchiladas
Enchilada Sauce:
- 3 tablespoons coconut oil
- 3-4 tablespoons of the Black Bean La Bamba spice blend, or taco seasoning packet
- 3-4 tablespoons of tomato paste
- 3-4 tablespoons of garlic, minced
- 1/3 cup beer, optional
- 1 large can of crushed tomatoes**
- 2 tablespoons honey
- 2-3 tablespoons acid of choice: lemon, red wine vinegar, or rice wine vinegar
- Salt and pepper
Please ready your ingredients before beginning, as the sauce progresses quickly, and will need your attention throughout. Additionally, this recipe requires a medium sized saucepot, and a rubber spatula that you don’t mind staining.
Over medium-high heat, add the first three ingredients to your saucepot, and continue to stir until slightly caramelized; this process is also known as pincer, and will add a lot of depth to your sauce. Additionally, it’s important to know that the mixture will contract in size, as the moisture evaporates; this is completely normal, so do not be alarmed. If you are adding beer to the sauce, please do so now, as it will decaramelize your saucepot; if not, that is okay, as the crushed tomatoes will do that as well. Next, add the crushed tomatoes and garlic, and turn the heat down to medium; continue to stir, as the tomatoes have a lot of sugar, and can burn easily. Finally, add the honey, your choice of acid, and season to taste; the honey and acid actually balance out the acidity of the tomatoes, so don’t be alarmed by their addition. Continue to cook for another 3-4 minutes, are until the sauce is slightly bubbling; turn off the heat, and begin preparing the enchiladas.
**You can also use pureed roasted peppers, or a combination of the two, depending upon your taste and their availability. Personally, I tend to use a combination, because of health issues (i.e. acid reflux). Additionally, it’s a great way to utilize ‘on their way out’ produce. :)
Enchiladas:
- 3 cups of pulled pork, leftover or purchased
- 2-3 cups of prepared black beans, leftover or purchased
- 2 cups cilantro-coconut rice, or prepared rice of choice
- Tortillas, I used the burrito size
- Enchilada sauce, either homemade or purchased
- 1 block of sharp-white cheddar cheese, I used Cabot, shredded
- ¼ c. chopped cilantro
- Salt and pepper
Now it’s time to assemble the enchiladas; I’ve created a slide show below, which has the step-by-step instruction. It’s important to remember to work backwards, as the enchiladas will flip directions once folded, and placed into the baking dish.
Once complete, ladle some additional sauce on top of the enchiladas, making sure to lightly cover their entire surface (including the edges). Next sprinkle a few tablespoons of the chopped cilantro evenly across the top, while still reserving a tablespoon to use as a garnish after baking. Finally, sprinkle with cheese, depending your desired amount; while I really like cheese – and made two pans of enchiladas –you may not, which is perfectly fine. :)
Since I’m not a fan of oven cleaning, I usually place my dish on top of a cookie sheet, before baking. Additionally, I bake the enchiladas COVERED for the first 20 minutes, and uncovered for the last ten minutes, so that the cheese is able to brown. Finally, while my 8x8 pan took thirty minutes to bake, yours might take slightly longer, depending upon its size; the internal temperature to be 165 degrees, before removing the oven. Sprinkle with the remaining chopped cilantro before serving, and enjoy with any additional toppings, such as leftover guacamole. :)
Any additional enchilada sauce, or pans of prepared enchiladas, can be frozen for later use; the prepared enchiladas are best if consumed within a month’s time. :)
Homemade Black Beans, Pulled Pork, Coconut-Cilantro Rice, and Guacamole:
Since I have to be at school early tomorrow morning, I’m posting these recipes tonight; please note, you can also begin rehydrating the beans now, if desired. Personally, I know that this may seem overwhelming, so please read over each recipe before beginning. Additionally, it’s the majority of your meal prep for the week, so fight through the pain process. ;) I hope that you have a great day, and thanks for cooking with me!
P.S. Since my photo isn't properly uploading, I assembled mine like a burrito bowl: rice on the bottom, followed by black beans, pulled pork, and guacamole. Enjoy! :)
Homemade Black Beans, Pulled Pork, Cilantro-Coconut Rice, and Guacamole:
Spice Blend: Black Bean La Bamba
Measure and combine all ingredients; store in an airtight container, such as a jar or Tupperware container, and label.
Black Beans:
Rehydrating: Step One
Before beginning, please rinse the beans under water, and throw away any questionable ones. Next, in a crockpot place all of the ingredients, and cook for 5 hours on the low setting. This would be a good time to work on your mise en place for the beans and pork roast; this can also be done the night before, so that the beans are waiting for you, versus you waiting on them. ;)
Once finished, remove the bay leaf, and strain out any excess liquid using a colander. Please rinse the beans, and wash the crockpot before proceeding to the next step.
Prepared Black Beans: Step Two
The quantities vary because: 1) vegetable sizes vary, and 2) the amount of desired vegetables/spice tend to vary per person, so choose whichever works best for you. :)
After you have finished precooking the beans, combine the ingredients – except for your chosen acid and cilantro – in a large crockpot; cook on the low setting for 6-8 hours, depending upon your schedule, and desired thickness. If preparing the pork roast, please begin it at this time.
Once complete, add the remaining ingredients, and season to taste.
Pork Roast: Step One
Before beginning, please choose your cooking vessel; while I used a disposable roasting pan, a crockpot would be preferable. Then measure out your spice mix, and pour it into either a deep-dish plate or cake pan. Next, unwrap the pork, and pat its surface dry using a few paper towels; place it on top of the spice mix, and coat evenly. After washing your hands, grease your cooking vessel with either cooking spray or coconut oil. Then add the pork roast, followed by the garlic cloves, and any residual mise en place. Cook on the low heat setting for 4 hours before adding ½ of the sauce recipe below, and cooking for an additional 3-4 hours.
Once complete, the pork should easily pull apart, with either the help of a fork or a pair of tongs. Additionally, the pork can be served either alone, or accompanied by the remaining sauce; I reduced mine over medium heat before serving, and finished with the reserved chopped cilantro.
Sauce for the Pork Roast: Step Two
Measure all ingredients – minus the 3 tablespoons of cilantro – and whisk until thoroughly combined; the remaining directions are above.
Cilantro-Coconut Rice: Begin 40 minutes prior to the beans’ and/or roast’s completion
Using a rice cooker,* add the following ingredients: rice, water, 8 ounces of coconut milk, and 1 ½ teaspoons of salt; once cooking, begin preparing your guacamole, if desired.
Once complete, add another 3-4 tablespoons of coconut milk –depending upon your desired consistency – and the other remaining ingredients, season to taste.
*You can also make the rice using the stovetop method.
Guacamole: Optional
Combine all the ingredients, and season to taste.
P.S. Since my photo isn't properly uploading, I assembled mine like a burrito bowl: rice on the bottom, followed by black beans, pulled pork, and guacamole. Enjoy! :)
Homemade Black Beans, Pulled Pork, Cilantro-Coconut Rice, and Guacamole:
Spice Blend: Black Bean La Bamba
- 1 tablespoon of each of the following: curry powder, apple wood smoked salt, and regular salt
- 2 tablespoons of each of the following: onion powder, garlic powder, cumin, ground mustard, black pepper, and brown sugar
- 3 tablespoons of each of the following: paprika and chili powder
- 1 teaspoon of cayenne pepper
- 2 teaspoons of crushed red pepper flakes
Measure and combine all ingredients; store in an airtight container, such as a jar or Tupperware container, and label.
Black Beans:
Rehydrating: Step One
- 1 lb. dried black beans
- 6 cups of water
- 1 tablespoon salt
- 1 bay leaf
Before beginning, please rinse the beans under water, and throw away any questionable ones. Next, in a crockpot place all of the ingredients, and cook for 5 hours on the low setting. This would be a good time to work on your mise en place for the beans and pork roast; this can also be done the night before, so that the beans are waiting for you, versus you waiting on them. ;)
Once finished, remove the bay leaf, and strain out any excess liquid using a colander. Please rinse the beans, and wash the crockpot before proceeding to the next step.
Prepared Black Beans: Step Two
The quantities vary because: 1) vegetable sizes vary, and 2) the amount of desired vegetables/spice tend to vary per person, so choose whichever works best for you. :)
- 1-2 peppers, either green or colored, cut into small dice pieces
- 1-2 onions, I used Vidalia, cut into small dice pieces
- 2-3 carrots, cut into small dice pieces
- 2 celery stalks, cut into small dice pieces, optional
- 3-4 cloves of garlic, minced
- 1-2 jalapeños, deseeded and minced; please remember to wear gloves, or wash your hands after handling, as the jalapeño oil may cause skin irritation.
- 2-3 tablespoons of the Black Bean La Bamba spice blend, or taco seasoning packet
- 1-2 bay leaves, optional
- 3 tablespoons tomato paste
- 2-3 cups of vegetable stock or water
- 1 regular-sized can of stewed tomatoes
- 1/3 cup beer, optional
- 2-3 tablespoons acid of choice: lime or lemon juice, red wine vinegar, of balsamic, reserve
- ½ cup chopped cilantro, optional but preferred, reserve
- Salt and pepper
After you have finished precooking the beans, combine the ingredients – except for your chosen acid and cilantro – in a large crockpot; cook on the low setting for 6-8 hours, depending upon your schedule, and desired thickness. If preparing the pork roast, please begin it at this time.
Once complete, add the remaining ingredients, and season to taste.
Pork Roast: Step One
- ¼ cup of Black Bean La Bamba spice blend, or taco seasoning packet
- 3 lb. pork butt or two pork tenderloins
- 3 cloves of garlic, whole
- Onion and pepper end pieces, if desired via black bean preparation
Before beginning, please choose your cooking vessel; while I used a disposable roasting pan, a crockpot would be preferable. Then measure out your spice mix, and pour it into either a deep-dish plate or cake pan. Next, unwrap the pork, and pat its surface dry using a few paper towels; place it on top of the spice mix, and coat evenly. After washing your hands, grease your cooking vessel with either cooking spray or coconut oil. Then add the pork roast, followed by the garlic cloves, and any residual mise en place. Cook on the low heat setting for 4 hours before adding ½ of the sauce recipe below, and cooking for an additional 3-4 hours.
Once complete, the pork should easily pull apart, with either the help of a fork or a pair of tongs. Additionally, the pork can be served either alone, or accompanied by the remaining sauce; I reduced mine over medium heat before serving, and finished with the reserved chopped cilantro.
Sauce for the Pork Roast: Step Two
- ¼ cup orange juice
- 2-3 tablespoons of lemon and/or lime juice
- ¼ c. ketchup
- 3 tablespoons of red wine vinegar or apple cider vinegar
- 2 tablespoons balsamic vinegar
- 2 tablespoons mustard
- 3 tablespoons brown sugar
- 2-3 tablespoons crushed red pepper flakes
- ¼ cup chopped cilantro + 3 tablespoons for garnish
- Salt and Pepper
Measure all ingredients – minus the 3 tablespoons of cilantro – and whisk until thoroughly combined; the remaining directions are above.
Cilantro-Coconut Rice: Begin 40 minutes prior to the beans’ and/or roast’s completion
- 2 cups of white rice
- 3 ½ cups water
- 1 regular-sized can of coconut milk
- 2 tablespoons lime juice
- 3 tablespoons of chopped cilantro
- 1 liberal pinch of cayenne pepper
- Salt
Using a rice cooker,* add the following ingredients: rice, water, 8 ounces of coconut milk, and 1 ½ teaspoons of salt; once cooking, begin preparing your guacamole, if desired.
Once complete, add another 3-4 tablespoons of coconut milk –depending upon your desired consistency – and the other remaining ingredients, season to taste.
*You can also make the rice using the stovetop method.
Guacamole: Optional
- 2 avocadoes, mashed
- 1 tablespoon minced red onion, optional but preferred
- 2 teaspoons minced garlic, optional but preferred
- 1-2 tablespoons lime juice
- 1 pinch of cayenne pepper
- Salt and pepper
Combine all the ingredients, and season to taste.
Chicken Fajitas:

Hello, how is your week going so far? Can you believe that it is already Wednesday? Holy kitty cats, that was quick. Last night, I filled out my Valentines Day cards, because I am a child; just kidding, I’m almost thirty, and weird. ;)
Anyways, I hope that you have a great rest of your day, and a fantastic dinner tonight! :)
Chicken Fajitas:
While I’m sure that every one is quite capable of assembling their own fajita, here is how I prepared mine:
Hello, how is your week going so far? Can you believe that it is already Wednesday? Holy kitty cats, that was quick. Last night, I filled out my Valentines Day cards, because I am a child; just kidding, I’m almost thirty, and weird. ;)
Anyways, I hope that you have a great rest of your day, and a fantastic dinner tonight! :)
Chicken Fajitas:
- 2 cups of prepared chicken, either leftover or 1½ breasts, cut into medium dice pieces
- 1 onion, I typically use either Vidalia or red, cut into thinly-sliced, half-moons
- 1 pepper, I typically use green (unless the colored peppers are on sale), cut into thinly-sliced, half-moon pieces
- Seasonings, I typically use red pepper flakes, paprika, cayenne, salt and pepper; however, if you don’t have those on hand, a taco-seasoning packet may be more economical. Additionally, these ingredients are optional, so choose accordingly.
- 2-3 tablespoons of your choice fat, I typically use coconut oil
- 2-3 tablespoons of lime juice, optional
- ¼- ½ cup of cheese, I typically use Cabot white cheddar
- Tortillas, optional
- Spinach, optional
- Avocado, optional
- Salsa, optional
While I’m sure that every one is quite capable of assembling their own fajita, here is how I prepared mine:
- Base: tortilla
- Next, I tossed together the spinach, cheese, and chopped tomatoes, which I used instead of salsa.
- Then, I added the prepared filling, and enjoyed. Since the feeling is hot, it melts the cheese, while also slightly wilting the spinach; I found that this made the fajitas easier to eat. ;)
Chicken and Dumpling Soup:

While I had initially planned on posting this recipe tomorrow, I thought that some of you might want to prepare the mise en place today, so that it can cook while you are at work. ;) Additionally, I have posted some tutorials – including one on knife skills – in the terminology section; make sure and check them out, especially if you are unsure what ‘medium dice’ means. :) Finally, I hope that you are having a wonderful Sunday, and thanks for letting me be apart of it!
Chicken and Dumpling Soup:
Soup:
- 2 cups of chicken, either leftover or ~1 ½ chicken breasts, cut into medium dice pieces
- 5-6 cups of chicken stock, either leftover or purchased; adjust the amount according to your personal preferences, and the overall size of your crockpot
- 3-4 carrots, cut into medium dice pieces
- 3-4 parsnips, cut into medium dice pieces
- 2-3 sticks of celery, optional, cut into medium dice pieces
- 1 onion, I typically use Vidalia, cut into medium dice pieces
- 1-2 tablespoons of crushed garlic, optional
- ¼ c. finely chopped fresh herbs, I typically use thyme, oregano, and parsley; however, they are optional
- 1 bay leaf, optional
- 1-2 tablespoons of lemon juice, optional
- ¼ c. white wine, optional
- Salt and pepper
- A pinch of cayenne pepper, optional
- 1 egg
- 1 tablespoon butter, softened
- 2 ½ teaspoons baking powder
- 1 cup flour
- ½ teaspoon salt
- ¼ teaspoon pepper
- 1/3 – ½ c. milk
- 3 tablespoons of grated parmesan cheese, optional
- 1-2 tablespoons of either freshly chopped or dried herbs, optional
For this method, I prefer to use medium diced vegetables, as they are better suited for long and slow cooking; however, please adjust your cuts accordingly. Additionally, since you will not be sweating your vegetables, you will not need an additional fat for this methodology. Finally, I usually reserve adding my cooked chicken until one hour before serving, so that it remains moist (and less chewy). ;)
Place the following ingredients in your crockpot: diced carrots, parsnips, celery, onion, minced garlic, bay leaf, white wine (if desired), and chicken stock; additionally, if your chicken is raw, add it in as well. On low heat, continue to cook the soup for 5-6 hours, depending upon your needs.
Once 5-6 hours has passed, add your already prepared chicken (if applicable), and increase the crockpot’s temperature to high. Next, begin to prepare the dumplings, by whisking together your egg and softened butter. In a separate bowl, mix together your flour, salt, baking powder, and pepper; additionally, if you would like to add either (or both) the parmesan cheese or chopped herbs, do so at this time. After these ingredients are evenly dispersed, combine with your egg and butter, before slowly adding in the milk; if you added the parmesan cheese, you will most likely need closer to a ½ c. of milk, otherwise 1/3 c. will do. The mixture should be evenly incorporated, but not over mixed.
Before dropping your dumplings into the crockpot, season the soup with salt, pepper, and cayenne pepper, if desired. Additionally, I usually add lemon juice for brightness, as well as the chopped herbs. Finally, I would recommend removing the bay leaf at this time, as it will be easier to find. :)
Next, drop your batter into the crockpot - one tablespoon at a time - until it gone; cover with the lid, and set a timer for thirty minutes. DO NOT OPEN THE LID UNTIL THE TIMER GOES OFF, or your dumplings will not cook.
After thirty minutes, check the doneness of the dumplings – and if they are ready – it’s time to eat! ;)
My Current Coffee Obsession:
Roasted Chicken and Vegetables, Compound Butter, and a Finishing Sauce:
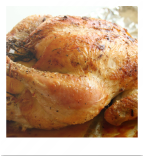
Hello, hello! I hope that you are enjoying some down time – preferably with something warm to drink – before getting ready for the day. I’m so excited to share these recipes with you, so I hope that you like them as well; have a great day, and happy cooking. :)
P.S. While I have not included a complex carbohydrate, I would recommend either serving this meal with couscous or a baked sweet potato; both are simple to prepare, and would nicely compliment the other components.
Roasted Chicken with Vegetables and an easy to make Compound Butter:
Chicken:
Preheat your oven to 445 degrees, and choose your cooking equipment; I typically use an aluminum lined cookie sheet with a wire rack, however a casserole dish or cast iron will do, as long as it accommodates the size of the bird. Afterwards, unwrap the chicken, check for a giblet and neck package, and rinse; if desired, save the giblets and neck for stock, otherwise discard. Next, pat the chicken dry using a few paper towels, before setting it on its cooking surface. If desired, stuff the bird’s cavity with herbs, a quartered citrus fruit, and three cloves of garlic; if using crushed garlic, reserve, and add to the olive oil dressing. Finally, mix together ¼ c. olive oil, 2 t. salt, 2 t. pepper, and garlic if reserved; generously apply to the chicken’s surface, before placing it in the oven. Once the chicken is in the oven, decrease the temperature to 425 degrees, and bake for twenty minutes; then decrease the temperature to 350, *tent* the bird’s breast using aluminum foil, and bake according to the chicken’s weight (twenty minutes per pound), i.e. if the chicken is five pounds, you would bake it for an additional one and forty minutes. Finally – thirty minutes before the chicken is done – baste it with either 2-3 tablespoons of compound butter, or some of its own drippings; return the bird to the oven sans aluminum tent. Once done, allow the chicken to rest for at least ten minutes before carving.
*Additional instructions, including a picture slide show, can be found on the "Terminology" page.
Have you softened your butter yet? If not, now is the time to take it out of the refrigerator.
Roasted Vegetables:
While your chicken is baking, begin preparing your roasted vegetables. I typically scrub my carrots and parsnips with a brush, thereby forgoing the peeling process; however, choose whichever method works best for you. Next, cut of the tops of both vegetables, and then halve length-wise. Lightly toss in olive oil, and line up on a sheet tray, cut side down. When you have finished basting the chicken, being baking the vegetables. Finally – while your chicken is resting – flip the vegetables right side up, and season with salt and pepper. Return to the oven, and broil for 3-5 minutes, or until lightly colored. If desired, immediately dollop a few tablespoons of compound butter on top, so that it melts and evenly dresses the vegetables upon serving.
Compound Butter:
After you have finished prepping the roasted vegetables, it’s time to prepare the compound butter; are you ready? Mix all ingredients together until fully and evenly incorporated, and then season to taste. DONE. While you will have extra butter, it’s delicious on bread, baked sweet potatoes, baked fish, and can be used to make Monday’s dumplings ---> stay tuned! :)
Sauce for Chicken: Optional
After you have basted the chicken, and have begun to bake the roasted vegetables, it is time to begin the sauce. Before beginning the roux, measure out your half and half, so that it’s waiting for YOU. Then – in a saucepan that is whisk safe – place your butter and flour; cook over medium-low heat, while continuously whisking, until the mixture is smooth – yet lightly colored – which will take about 3-5 minutes. Next slowly begin to incorporate the half and half, while continuing to whisk, until the mixture is stable (i.e. resembles a thicker gravy, but not too thick that it’s not liquefied); reduce heat to low, and continue to stir occasionally, until the chicken is done. Once you have removed the chicken from the oven – and have tended to your roasted vegetables – it is time to finish your sauce. While this may seem overwhelming, I have faith in you; additionally, the vegetables are great room temperature, so feel free to finish those before returning to the sauce. :)
Once ready, gather about ¼ c. of the chicken’s drippings, so that they are ready to use. Additionally, have either your lemon juice, white wine, or red wine vinegar out, and easily accessible. Next, return the heat to medium-low, and begin whisking; slowly begin to incorporate the drippings, using the same methodology as the half and half. Now it is time to add some acidity – which can be tricky to estimate – so start small, and add as needed; I would begin with 1 teaspoon, and adjust by ½ teaspoon increments. Finally, remove from heat, season to taste, and add chopped fresh herbs (or 2 teaspoons of the herb tubes) if desired.
Stock:
While I’m sure that you are tired, it is time to cleanup, and prepare the stock; please do not hate me, I promise it will be well worth the effort. :) In a large stockpot or crockpot, place the chicken carcass, chicken neck and giblets (if desired), bay leaves (if desired), and parsley stems (again, if desired). Then, cover ¾ of the way with water, and cook accordingly:
P.S. While I have not included a complex carbohydrate, I would recommend either serving this meal with couscous or a baked sweet potato; both are simple to prepare, and would nicely compliment the other components.
Roasted Chicken with Vegetables and an easy to make Compound Butter:
Chicken:
- 1 whole chicken, 5-7 pounds is the weight I typically use
- Fresh herbs, I typically like to use oregano with either thyme or sage
- Citrus, I typically like to use lemon with thyme, and clementine or orange with sage, however either will do
- 3 cloves of garlic, or 2 tablespoons crushed
- Olive oil, salt, and pepper
- Compound Butter, optional
Preheat your oven to 445 degrees, and choose your cooking equipment; I typically use an aluminum lined cookie sheet with a wire rack, however a casserole dish or cast iron will do, as long as it accommodates the size of the bird. Afterwards, unwrap the chicken, check for a giblet and neck package, and rinse; if desired, save the giblets and neck for stock, otherwise discard. Next, pat the chicken dry using a few paper towels, before setting it on its cooking surface. If desired, stuff the bird’s cavity with herbs, a quartered citrus fruit, and three cloves of garlic; if using crushed garlic, reserve, and add to the olive oil dressing. Finally, mix together ¼ c. olive oil, 2 t. salt, 2 t. pepper, and garlic if reserved; generously apply to the chicken’s surface, before placing it in the oven. Once the chicken is in the oven, decrease the temperature to 425 degrees, and bake for twenty minutes; then decrease the temperature to 350, *tent* the bird’s breast using aluminum foil, and bake according to the chicken’s weight (twenty minutes per pound), i.e. if the chicken is five pounds, you would bake it for an additional one and forty minutes. Finally – thirty minutes before the chicken is done – baste it with either 2-3 tablespoons of compound butter, or some of its own drippings; return the bird to the oven sans aluminum tent. Once done, allow the chicken to rest for at least ten minutes before carving.
*Additional instructions, including a picture slide show, can be found on the "Terminology" page.
Have you softened your butter yet? If not, now is the time to take it out of the refrigerator.
Roasted Vegetables:
- 3-4 carrots
- 3-4 parsnips
- Olive Oil, salt, and pepper
- Compound Butter, optional
While your chicken is baking, begin preparing your roasted vegetables. I typically scrub my carrots and parsnips with a brush, thereby forgoing the peeling process; however, choose whichever method works best for you. Next, cut of the tops of both vegetables, and then halve length-wise. Lightly toss in olive oil, and line up on a sheet tray, cut side down. When you have finished basting the chicken, being baking the vegetables. Finally – while your chicken is resting – flip the vegetables right side up, and season with salt and pepper. Return to the oven, and broil for 3-5 minutes, or until lightly colored. If desired, immediately dollop a few tablespoons of compound butter on top, so that it melts and evenly dresses the vegetables upon serving.
Compound Butter:
- Butter, one stick (softened) minus 3 tablespoons, if making the sauce; otherwise, you can forgo the reservation ***If using salted butter, adjust additional salt usage accordingly***
- 3 tablespoons of chopped herbs or herb tubs of choice, I typical use a combination of parsley, cilantro, and basil
- 2 tablespoons crushed garlic
- 2-3 tablespoons of orange marmalade, optional, and may be substituted with honey; amount is dependent upon both the sweetness of the product, and the overall desired sweetness of the finished butter
- Salt and Pepper
After you have finished prepping the roasted vegetables, it’s time to prepare the compound butter; are you ready? Mix all ingredients together until fully and evenly incorporated, and then season to taste. DONE. While you will have extra butter, it’s delicious on bread, baked sweet potatoes, baked fish, and can be used to make Monday’s dumplings ---> stay tuned! :)
Sauce for Chicken: Optional
- Reserved butter, 3 tablespoons
- 1 tablespoon of flour
- 1/3-1/2 c. half and half, however, milk will also work
- Chicken drippings
- Lemon juice, white wine, or red wine vinegar
- Chopped herbs or herb tubes, I typically use parsley or thyme, however they are optional
- Salt and pepper
After you have basted the chicken, and have begun to bake the roasted vegetables, it is time to begin the sauce. Before beginning the roux, measure out your half and half, so that it’s waiting for YOU. Then – in a saucepan that is whisk safe – place your butter and flour; cook over medium-low heat, while continuously whisking, until the mixture is smooth – yet lightly colored – which will take about 3-5 minutes. Next slowly begin to incorporate the half and half, while continuing to whisk, until the mixture is stable (i.e. resembles a thicker gravy, but not too thick that it’s not liquefied); reduce heat to low, and continue to stir occasionally, until the chicken is done. Once you have removed the chicken from the oven – and have tended to your roasted vegetables – it is time to finish your sauce. While this may seem overwhelming, I have faith in you; additionally, the vegetables are great room temperature, so feel free to finish those before returning to the sauce. :)
Once ready, gather about ¼ c. of the chicken’s drippings, so that they are ready to use. Additionally, have either your lemon juice, white wine, or red wine vinegar out, and easily accessible. Next, return the heat to medium-low, and begin whisking; slowly begin to incorporate the drippings, using the same methodology as the half and half. Now it is time to add some acidity – which can be tricky to estimate – so start small, and add as needed; I would begin with 1 teaspoon, and adjust by ½ teaspoon increments. Finally, remove from heat, season to taste, and add chopped fresh herbs (or 2 teaspoons of the herb tubes) if desired.
Stock:
- Chicken carcass
- Giblets and neck, optional, and if enclosed in your bird
- Water
- 2 bay leaves, optional
- Parsley stems, optional
While I’m sure that you are tired, it is time to cleanup, and prepare the stock; please do not hate me, I promise it will be well worth the effort. :) In a large stockpot or crockpot, place the chicken carcass, chicken neck and giblets (if desired), bay leaves (if desired), and parsley stems (again, if desired). Then, cover ¾ of the way with water, and cook accordingly:
- Stockpot: Medium-low heat for 2-3 hours
- Crockpot: Low heat for eight hours, or overnight
Flavor Infused Lemonade:

Good morning friends, family, and fellow blog followers! While I had debated adding this recipe – as it requires no actual cooking per se – it is one of my favorites, so please forgive my usage of artificial sweeteners; I promise it will be well worth it. ;) Last summer, my local grocer had mangoes for a dollar a piece – and being the savvy shopper that I am – ended up purchasing at least five. While I really enjoy mangoes, I felt like I was wasting a lot of the fruit, due to the pit; alas, the secret ingredient to my infused lemonade!
Flavor Infused Lemonade:
- 1 packet of Crystal Light lemonade, I usually end up using whichever brand is on sale
- 10 cups water, I add more water than the original directions call for as the mango will flavor your drink as well
- 1 mango pit, I use whichever mangoes are on sale, so choose your varietal accordingly
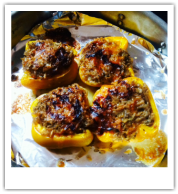
Stuffed Peppers:
Every year around this time, our Facebook pages become inundated with weight loss plans and tips, most of which will never be fully realized. While health and wellness goals are important, they are not merely reflected by the numbers on the scale, but rather by your own every day activities; i.e. your outlook on life, your ability to explore, and your enjoyment of the world around you.
This year, in hopes of increasing my daily energy levels, I have committed to eat more healthfully. In the past, I have made excuses – such as too much homework, not enough money, or too many trips – that have restricted my daily meals to oatmeal with peanut butter, copious amounts of greek yogurt, and endless bowls of soup. While none of things are bad in and amongst themself, they were failing to meet my nutritional needs, such as iron, calcium, vitamins a and c, etc.
Therefore, if any of you are feeling the same way, I have a recipe for you; it is inexpensive, easy, and portable – all of which are right up my alley! ;)
Stuffed Peppers:
Begin by cooking the onions, mushrooms, and garlic with a tablespoon of your preferred fat (I used butter) over medium heat until lightly browned; this should take 4-5 minutes. Next, add 1 and ¾ c. water, and bring the mixture up to a boil; then add the rice and seasoning packet. Reduce heat and cover. While the rice is cooking, prepare your peppers, and place on a lined or greased casserole dish. After your rice has cooked, scoop the mixture into your halved peppers, and top with cheese; at this time you can also drizzle with a balsamic reduction, if you so desire. Finally, broil for 3-5 minutes, or until the cheese becomes nice and bubbly; reduce the temperature to 350 degrees, and finish baking for another 10 minutes. **Side note: this makes extra rice than what is needed, so you will have leftovers.
Personally, I like to eat these on top of a bed of spinach, or with a fried egg; however, they are also good as a side dish. :)
This year, in hopes of increasing my daily energy levels, I have committed to eat more healthfully. In the past, I have made excuses – such as too much homework, not enough money, or too many trips – that have restricted my daily meals to oatmeal with peanut butter, copious amounts of greek yogurt, and endless bowls of soup. While none of things are bad in and amongst themself, they were failing to meet my nutritional needs, such as iron, calcium, vitamins a and c, etc.
Therefore, if any of you are feeling the same way, I have a recipe for you; it is inexpensive, easy, and portable – all of which are right up my alley! ;)
Stuffed Peppers:
- 2 peppers, I used yellow, but any varietal will do; halved, with seeds and stems removed
- ¼ c. chopped onion
- ½ c. chopped mushrooms
- 1 T. minced garlic
- 1 package of Near East Rice Pilaf, Wild Mushroom and Herb
- 1/3 c. shredded cheddar cheese, I used Cabot’s Alpine variety because it was on sale, however any sharp cheddar will do
- Balsamic reduction, optional
Begin by cooking the onions, mushrooms, and garlic with a tablespoon of your preferred fat (I used butter) over medium heat until lightly browned; this should take 4-5 minutes. Next, add 1 and ¾ c. water, and bring the mixture up to a boil; then add the rice and seasoning packet. Reduce heat and cover. While the rice is cooking, prepare your peppers, and place on a lined or greased casserole dish. After your rice has cooked, scoop the mixture into your halved peppers, and top with cheese; at this time you can also drizzle with a balsamic reduction, if you so desire. Finally, broil for 3-5 minutes, or until the cheese becomes nice and bubbly; reduce the temperature to 350 degrees, and finish baking for another 10 minutes. **Side note: this makes extra rice than what is needed, so you will have leftovers.
Personally, I like to eat these on top of a bed of spinach, or with a fried egg; however, they are also good as a side dish. :)
2013 Posts:
Breakfast Sandwich, two ways:
- Naan bread, I get the rectangular ones at Trader Joes
- 4 eggs
- Bacon, 3 slices
- Tomato
- Avocado
- Red onion
- Feta cheese, crumbled
- Cilantro, finely chopped
- Chipolte hummus, I get mine at Trader Joe's
Slice your tomato, red onion, and avocado into thin, 1/8', slices. On your first naan spread hummus,eggs, layer veggies, and top with feta & cilantro. For your second lay down your bacon slices, eggs, layered veggies, and top with feta & cilantro.
Bacon, Butternut Squash, Lentil Soup:

Ingredients:
- 2 tablespoons butter
- 1/2 c. bacon, finely sliced, uncooked
- 1/2 c. onions, finely minced
- 1/4 c. carrots, finely minced
- 1/4 c. celery, finely minced
- 1 can of diced tomatoes, 12 oz
- 2 c. butternut squash, cooked
- 3 c. vegetable stock
- 1 1/2 c. lentils, any variety, personally used golden
- Salt, Pepper, and balsamic to taste
Provence Beef Roast
Ingredients:
While allowing your roast to rest, strain your veggies and stock. Reserve a half cup of the veggies and all of the stock. In a sauce pan heat 3 tb. butter and 3 tb. of flour together until you have a light roax. Gradually start adding your stock until you have your desired consistency. Allow to cook for 20 minutes, stirring occasionally.
Serve roast over a bed of mashed potatoes, topped with gravy, and your reserved vegetables.
- 2 tb. butter
- 1 small red onion, small dice
- 12 oz shitakke mushrooms, cut into 1 inch pieces
- 2 artichokes, cut into eighths
- 1 medium eggplant
- 2 heads of garlic, peeled & roasted
- 2 bay leaves
- 2 tb. French Provence seasoning mix
- 2 c. beef stock
- 3 lb. chuck roast
- salt and pepper to taste
While allowing your roast to rest, strain your veggies and stock. Reserve a half cup of the veggies and all of the stock. In a sauce pan heat 3 tb. butter and 3 tb. of flour together until you have a light roax. Gradually start adding your stock until you have your desired consistency. Allow to cook for 20 minutes, stirring occasionally.
Serve roast over a bed of mashed potatoes, topped with gravy, and your reserved vegetables.
Sweet Potato, Tri-Colored Bean Chili
- 2 tb. butter
- 1 medium red onion, small dice
- 1/2 c. celery, small dice
- 1/2 c. carrots, small dice
- 4 c. sweet potatoes, small dice
- 1 c. frozen pepper mix
- 2 c. frozen corn kernels
- 1 lg. can of diced tomatoes
- 1 lb. ground sirloin
- 1 can of EACH: kidney, black, and chick pea beans
- 1 c. BBQ sauce of your choice, I used Wahoo!'s Sweet & Spicy
- 1 c. beef stock
- 1 packet of chili seasoning
- Salt & Pepper to taste
- Assorted toppings: sharp cheddar cheese, Greek yogurt, avocado slices
Kale, Sweet Potato, and Cauliflower Hash
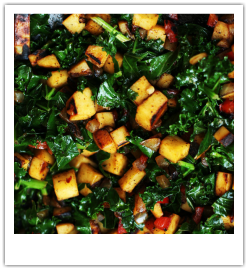
- 1 head of purple kale, cut into 2 inch strips
- 2 sweet potatoes, cut into 1 inch cubes
- 1 onion, diced into 1 inch cubes
- 1 head of cauliflower, cut into 1 inch florets
- 1 T. garlic, minced
- 3 T. bacon, cut into strips
- 1/3 c. chicken stock
- Seasoning to taste
Tipsy Grape

- 9 mint leaves
- 3 oz bourbon
- 2 oz concord grape juice
- 1 oz fresh lemon juice
- 4 tsp maple syrup
Muddle eight of the mint leaves in a base of a shaker. Add liquids. Fill the shaker with ice & shake well. Strain into a cocktail glass and garnish with the remaining mint leaf. Enjoy!
Cornbread Panzanella Salad
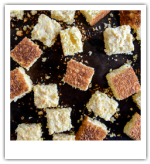
- 1 package of cornbread, prepared
- 1 pint of cherry tomatoes, halved
- 2 avocados, large dice
- 1 can of black beans, drained
- 1 shallot, minced
- 1/4 c. chopped cilantro
- 1 jar of sweet corn relish, I used Trader Joe's'
- 1/3 c. olive oil
- juice of a lemon
- 1 tsp. chili powder
- 1 tsp. crushed red pepper flakes
- Salt and pepper, to taste
Cube the corn bread into two inch pieces, toss with black beans & half a jar of corn relish, and set aside. To prepare your dressing, whisk together your lemon juice & spices. Slowly add in your oil. Once a stable emulsion occurs, add in your remaining relish. Before serving, add your prepared vegetables to your starch mixture, and fold in dressing.
Tempeh Goulash
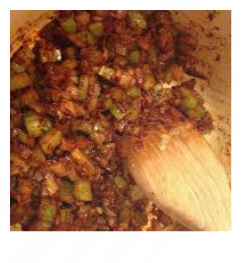
- 1 onion, medium dice
- 2 c. mushrooms, quartered
- 1 c. celery, medium dice
- 1 T. garlic, minced
- 1/4 c. tomato paste
- 2 c. red wine
- 1 can of tomato puree
- 1/4 c. catsup
- 1/4 c. paprika
- 2 t. dried maroram
- 2 lb. of tempeh, cut into 1/2 inch squares
- Salt and pepper to taste
Begin by sweating your onions, mushrooms, and celery in 2 T. of oil & slightly salt. Once translucent, add garlic and cook for an additional two minutes before pincering (add color) your vegetables with the tomato paste. Add your red wine & reduce the amount by half. Add remaining tomato products & spices. Finally, add your tempeh & cook for an additional 15 minutes, or until tempeh is warmed through. Salt & Pepper to taste. Perfectly paired with crusty baguette or rice.
Roasted Beets, Butternut Squash, & Leeks Wheat berry Salad
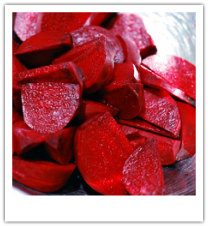
- 4 beets
- oil
- 1 orange, sliced
- 4 sprigs of thyme
- 1 cinnamon stick
- 1 lg. butternut squash, peeled & lg. diced cubes
- 3 leeks, thinly sliced
- 3 T. olive oil
- 2 c. wheat berries, prepared
- Salt & Pepper to taste
To begin, wash your beets well & place in a deep dish baking container. Fill the container with enough oil to cover 3/4 of your beet's surface. Add your thyme, orange slices, cinnamon stick, and a liberal amount of salt. Cover & bake at 375 for 2 1/2 hours. Remove your beets & allow to cool before removing skins & cutting into large dice cubes. Strain the oil through a china cap, keeping the oil for cooking uses in the future & composting the remaining infusers.
Toss together your squash, leeks, olive oil, and salt & pepper. Roast at 425 degrees for 35-45 minutes, gently tossing every 15 minutes. When finished, combine your beets, squash, and berries together. Add infused oil & salt & pepper to your liking.
Quinoa, Chickpea, & Edamame Salad
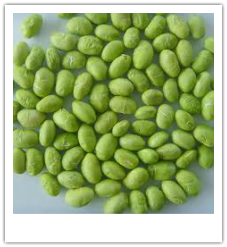
- 2 c. quinoa, prepared
- 2 cans of chickpeas, drained & rinsed
- 2 c. edamame, prepared
- 1/4 c. golden raisins
- 1 clove garlic
- 2 T. sesame oil
- 2-3 T. lemongrass simple syrup
- 2 T. White wine vinegar
- 3 T. chopped parsley
- Oil, preferably infused orange oil from the beets
- Salt & pepper
In a food processor, gently pulse your raisins, garlic, parsley, sesame oil, syrup, & vinegar. Once a homogenize mixture, gently stream in your oil until you have a consistency that pleases you (I used around 3/4 c.), & salt & pepper to taste. Mix dressing & remaining ingredients together. Best served chilled.
Southwest Quinoa Salad with Creamy Avocado Dressing
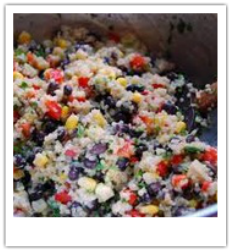
- 2 c. Quinoa, prepared & cooled
- 2 c. black beans, strained & rinsed
- 2. corn, either fresh or frozen, cooked & cooled
- 1 sm. red onion, small dice
- 1 1/2 c. swiss chard stems, small dice
- 3 T. sliced scallions, reserve bases
- 3 T. cilantro, chopped roughly + 1/4 c. leaves
- 2 avocados
- 2 cloves garlic
- 2 T. lemon juice
- 1 T. white wine vinegar
- 2-3 c. oil, I used the orange infused oil from the beets above
- Salt & pepper to taste
Mix your grain, beans, corn, onion, swiss chard, scallions, & chopped cilantro together. Salt and pepper the mixture to taste. In a food processor, pulse together your avocado, garlic, a 1/4 c. cilantro, scallion bases, lemon juice, and a quarter cup oil. Once smooth, slowly start streaming in your oil until a desired consistency is met. Finish with 1 T. white wine vinegar & salt and pepper. Fold into salad mixture & enjoy, maybe even with additional avocado slices. :)
Quinoa, Brown Butter, and Almond Granola
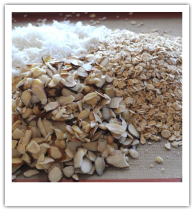
- 2 c. quinoa, cooked
- 2 c. old fashion oats
- 1 c. barley oats
- 1 c. flax seeds
- 2 c. sliced almonds
- 1 c. dried, mixed berries (I really like: cherries, goggi, blueberries, & cranberries)
- 1 c. shaved coconut
- 1/2 c. sunflower seeds
- 1/2 c. honey
- 1 c. butter
- 1/2 c. brown sugar
- 1 t. vanilla
In a saucepan, over low heat, melt your butter & continue cooking until it is brown in coloring, about 8 minutes. Add your sugar, honey, and vanilla & continue to heat until fully dissolved. In a large bowl, combine all your dry ingredients. Pour the brown butter sauce over & mix thoroughly. Bake at 325 degrees for 50-60 minutes, stirring every 8-10 minutes. Cool & store.
